Products Series
- UV Radiometer
- UV Energy Meter
- Lens Transmission Meter
- Optical Density Meter
- Friction Testing Machine
- Coating Thickness Gauge
- Surface Roughness Gauge
- Gloss Meter
- Laser Interferometer
- UV/VIS spectrophotometer
Contacts

Phone:0755-23158752
Fax:0755-23763184
Mobile:15118149162
E-mail:nick@zreexing.com
Q Q:1144986731
Address:601, NO.1 building, hesheng Industrial Zone, hebei industrial park,Longhua New District, Shenzhen
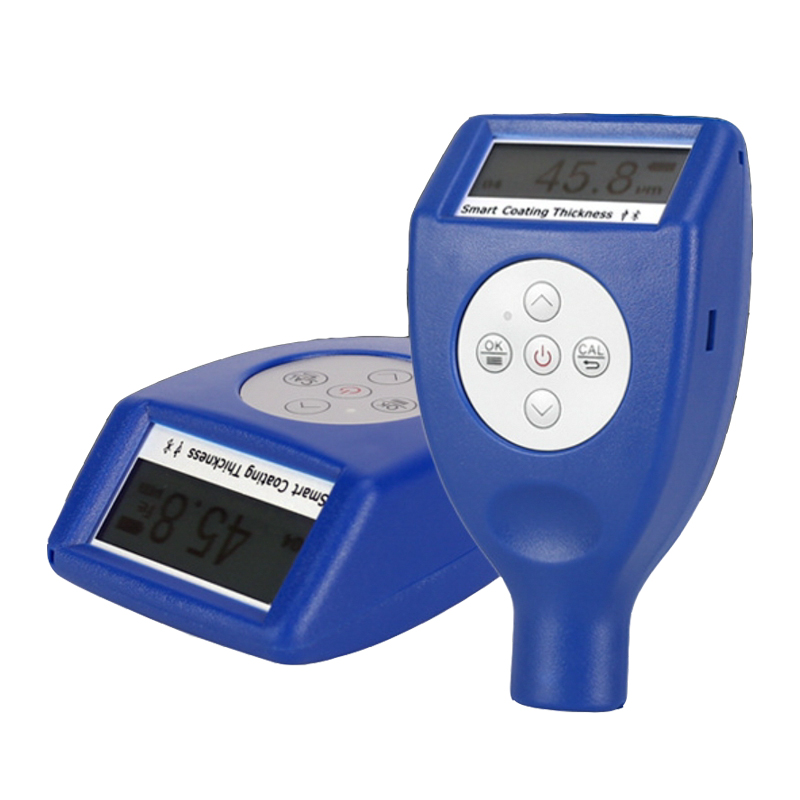
Coating Thickness Gauge

Description:
Dual-function thickness gauge, complete automatic conversion of magnetic induction and eddy current measurement Application of dual-function measurement technology, can automatically identify magnetic or non-magnetic substrate, and then adopt the corresponding test method, suitable for a variety of measurement environments. The thickness of the non-conductive coating on the non-magnetic substrate and the non-magnetic coating on the magnetic substrate can be measured. The GT8102 coating thickness gauge is a magnetic and non-magnetic dual-purpose instrument with a wide range of applications. Its technical parameters fully conform to national standards. This instrument is a portable coating thickness measuring instrument integrating magnetic and eddy current. It can measure coating thickness quickly, without damage and precisely. It can be used in the laboratory or in the engineering field. The instrument can be widely used in manufacturing industry, metal processing industry, chemical industry, commodity inspection and other testing fields. It is a necessary instrument for material protection.
The Fe probe can detect the thickness of all non-magnetic coatings, such as paint, powder coating, plastic, porcelain, chromium, copper, zinc, etc., applied to steel and iron. The NFe probe detects the thickness of all insulating coatings, such as paint, plastic, porcelain, etc. These coatings must be applied to non-magnetic metal substrates such as aluminum, copper, brass or stainless steel.
Main Features:
● Two thickness measurement methods, magnetic and eddy current, can measure the thickness of the non-magnetic covering layer on the magnetic metal matrix and the thickness of the non-conductive covering layer on the non-magnetic metal matrix;
● Can quickly and automatically identify iron matrix and non-iron matrix;
● Single point calibration and two point calibration can be used to calibrate the instrument;
● The basic calibration correction method can be used to update and correct the probe system error to ensure the accuracy of the instrument in the measurement process;
● Negative display function to ensure the accuracy of zero point calibration of the instrument and improve the test accuracy;
● The operation process has a beep prompt;
● Two shutdown modes: manual shutdown mode and automatic shutdown mode;
● Battery voltage indication: low voltage prompt;● Micro-power design, less than 10 microamps of current in standby mode;
● Measurement method: F magnetic induction NF eddy current.Technical Parameter:
Measuring Range | 0~1500μm |
Resolution Ratio | 0.1μm(0~99.9μm), 1μm(100~1500μm) |
Minimal surface | convex 5mm / concave 5mm |
Minimum Substrate Thickness | 0.4m |
Accuracy | ±(1+2%H), H:Coating Thickness |
Measuring Area | 10*10mm |
Power Supply | 2pcs*AA Battery |
Data Transfer | USB / Bluetooth |
Working Environment | -10℃--50℃ |
Humidity | 10-85%RH |
Product size | 126*69 *35 mm (without probe) |
Product weight | 97g (without battery) |
Measurement accuracy error | Zero calibration ±(1+2%H); Multi-point calibration ± (1+2%H). H represents the coating thickness |
Next:No record